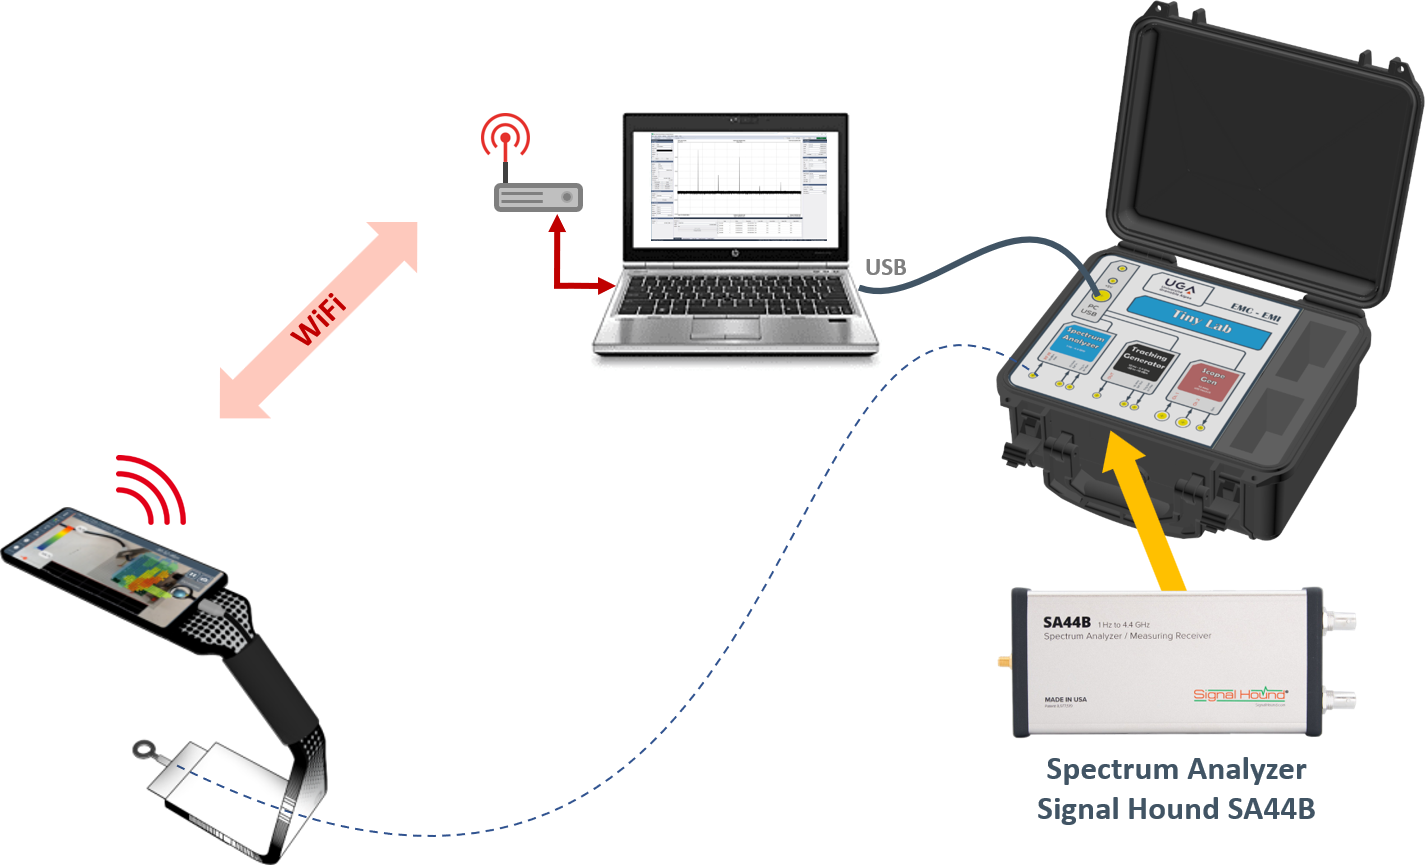
Scanphone option for EMC suitcase

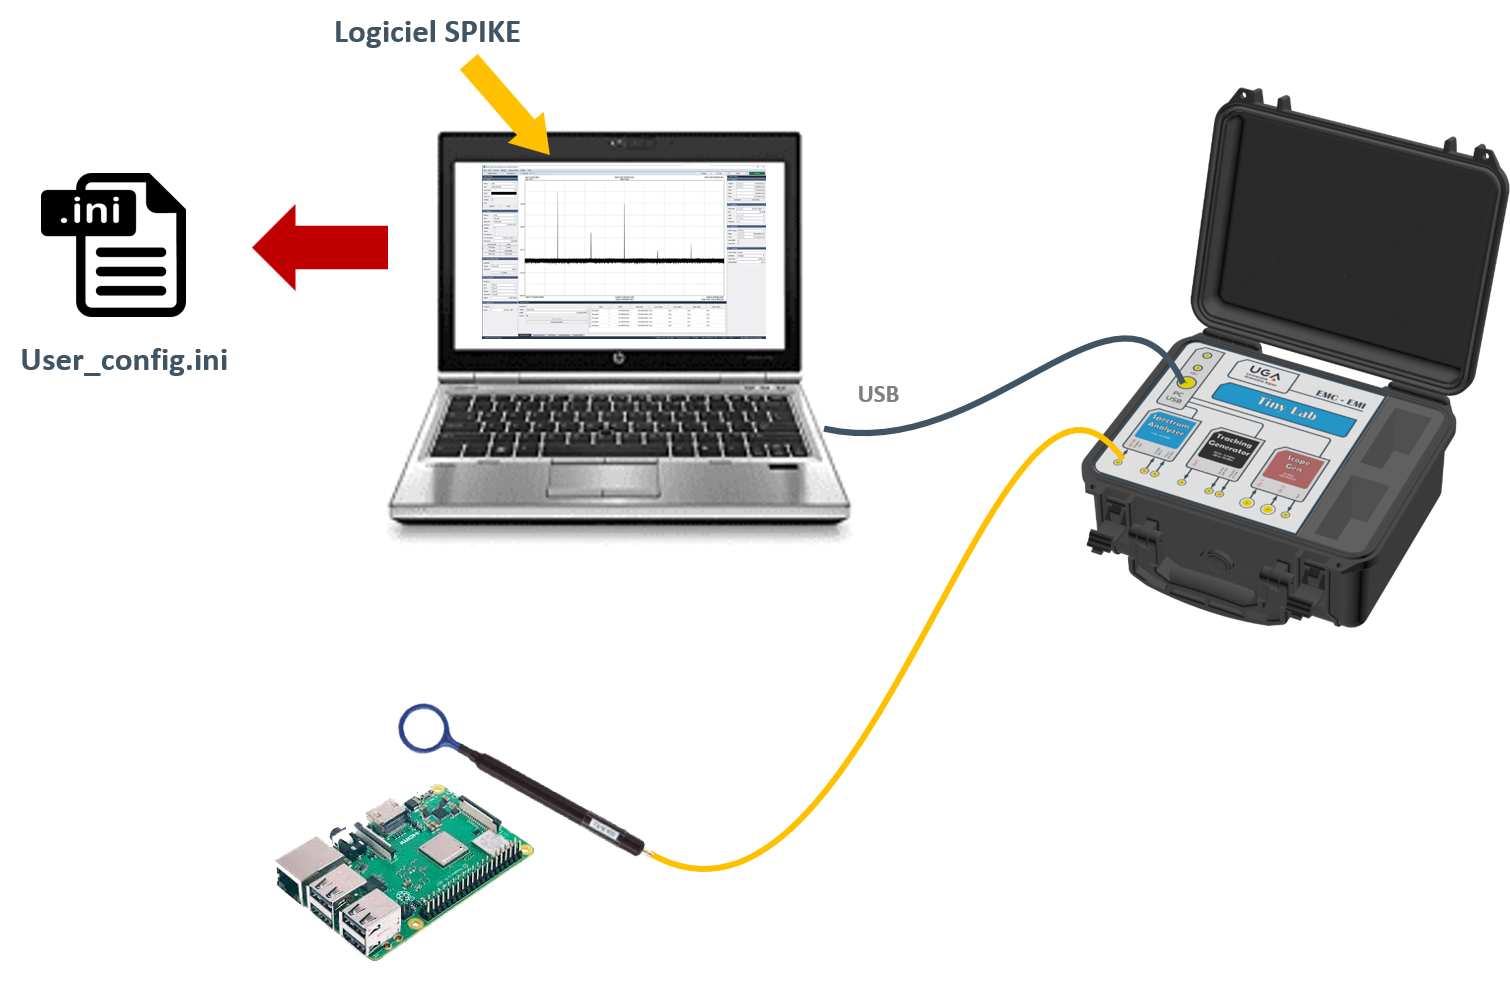
Step 01
Configure the software and export your settings (user_config.ini).
- Spike software available here.
- Start; Stop; Freq; RBW VBW…
- Caution : SWEEP < 100mS
- Export config

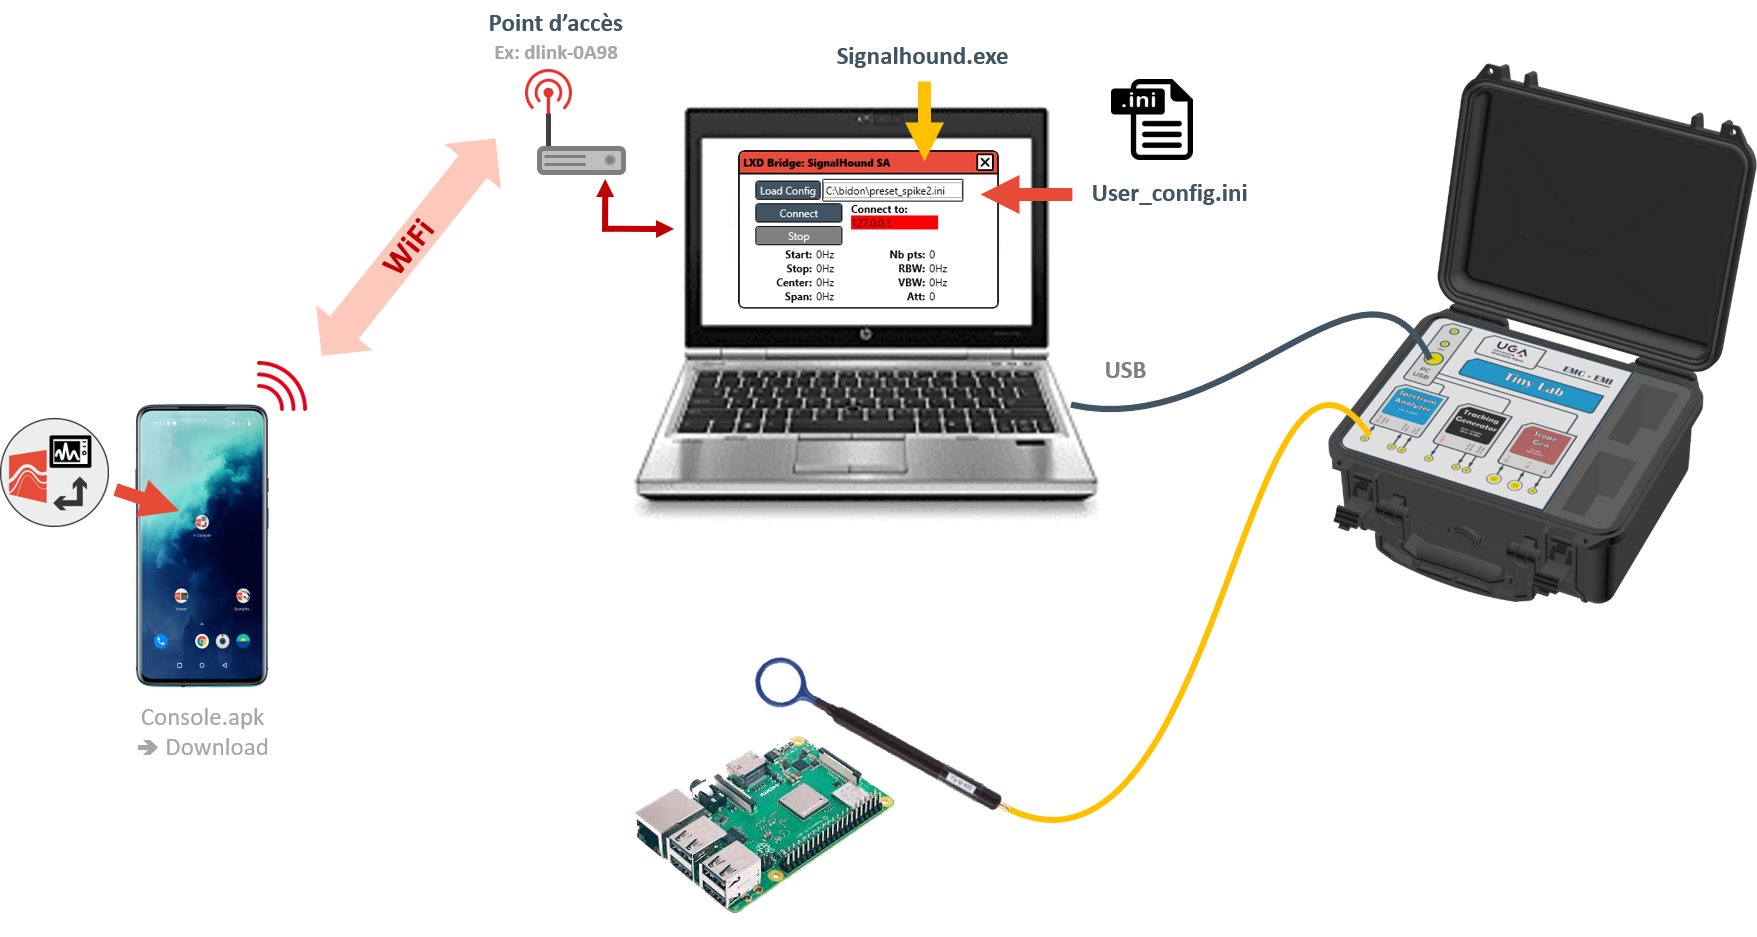
Step 02
Close Spike and launch SignalHound.exe
- Software SignalHound.exe (bridge) here.
- Launch SignalHound and load the configuration file you saved. (user_config.ini)
- Note the IP number of your access point. (Example 192.168.1.75)


Step 03
Test communication with the console.
- Connect via WiFi to the access point.
- Console application available here.
- Test the IDN
- Test spectrum communication/reception

Step 04
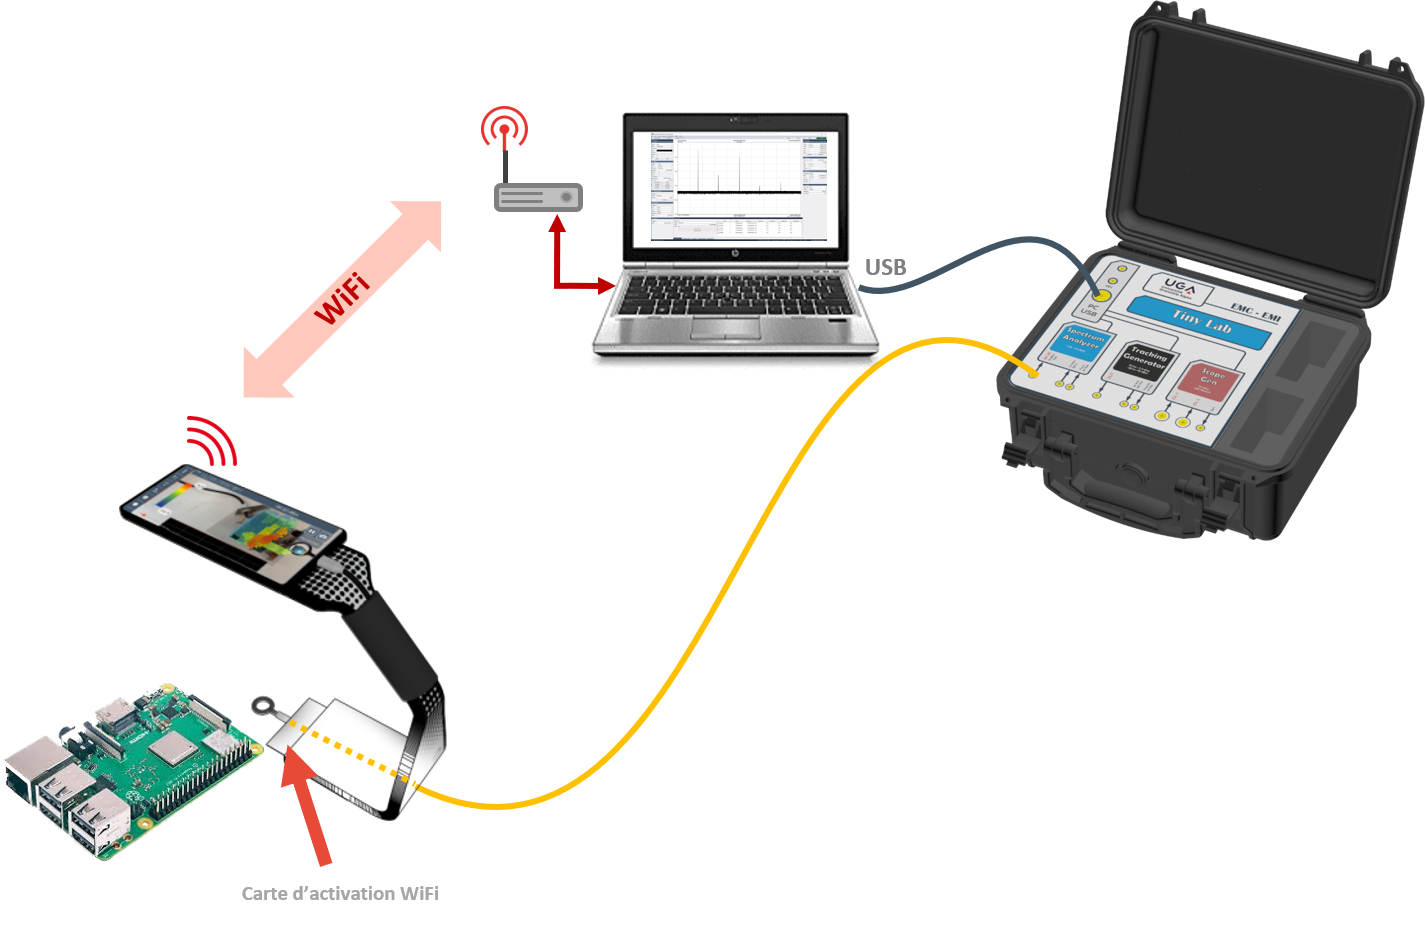
Mapping with Scanphone
- Connect the Scanphone
- Launch the application (access point IP)
- Creat a map


VIEWER
Exemple cartographie SignalHound ici.
Pour information
ONLINE Viewer (gratuit en ligne)
ONLINE Viewer + exemple (arche)
OFFLINE Viewer (sur demande)

